Connecting Squarespace domain to Shopify
If you purchased a domain from Squarespace and want to use it on a Shopify store without moving the hosting to Shopify, then this guide will help you manually connect your Squarespace domain to Shopify.
On this page
Step 1: Log in to your Squarespace account
- Open a new browser tab, and then log in to your Squarespace account.
- Click Account dashboard > Domains, and then click the domain that you want to connect to Shopify.
- Click DNS.

- Optional: If you have existing records that you want to keep, such as MX records or TXT records, then save them in a Word Document or Google Docs.
- Click the trash can icon to delete the existing Squarespace DNS records.

Step 2: Add the A record
Note: An A record is required only when connecting the root domain (for example, shopify.com). If you're connecting a subdomain (for example, shop.shopify.com), then you only need to configure a CNAME record.
- From the DNS settings of your Squarespace domain, click ADD RECORD.

- Enter the following A record to your DNS settings:
- Host: @
- Type: A
- Priority: -
- Data: 23.227.38.65
- Click SAVE.

Step 3: Add the CNAME records
- From the DNS settings of your Squarespace domain, click ADD RECORD.
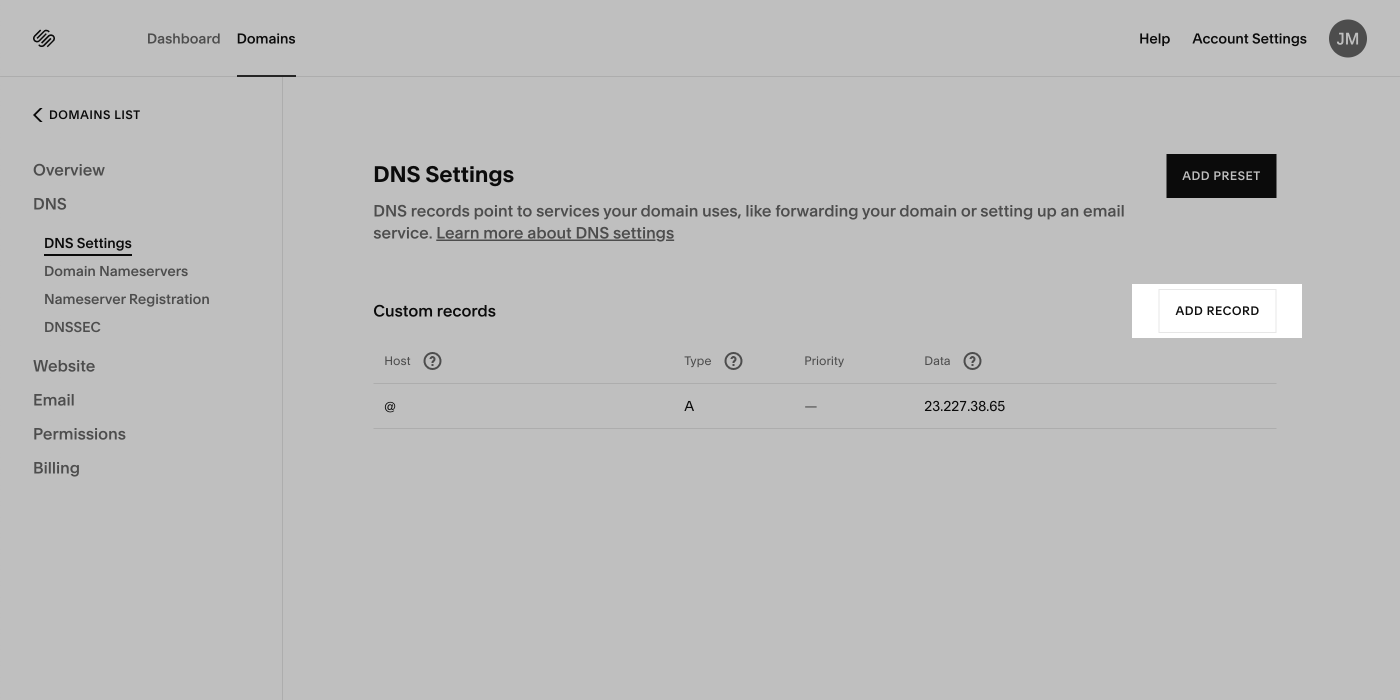
- Enter the following CNAME record to your DNS settings:
- Host: www
- Type: CNAME
- Priority: -
- Data: shops.myshopify.com
- Click SAVE.

Step 4: Connect your domain to Shopify
From your Shopify admin, go to Settings > Domains.
Click Connect existing.
Type the name of the domain that you want to connect, and then click Next.
Step 5: Additional verification for your Shopify domain
As an additional security measure, your domain might require extra verification. This extra verification requires you to create a TXT record on the domain.
Steps:
- In your Squarespace.com account, click Account Dashboard > Domains.
- Click the domain that you're connecting to Shopify, and then click DNS.
- Click ADD RECORD.
- In a new tab, go to your Shopify admin, click Settings > Domains, and then click the domain that you're verifying.
- Locate the New value, and then click the copy icon.
- Go back your Squarespace tab, and then enter the following TXT record to your DNS settings:
- Host: shopify_verification
- Type: TXT
- Priority: -
- Data: Paste the Required value
- Click SAVE.

- Go back to your Shopify admin tab, then click I updated DNS records.