Connecting a Network Solutions domain to Shopify
If you purchased a domain from Network Solutions and want to use it on a Shopify store without moving the hosting to Shopify, then this guide will help you manually connect your Network Solutions domain to Shopify.
On this page
Step 1: Log in to your Network Solutions account
- Open a new browser tab and log in to your Network Solutions account.
- Click Domains.
- Scroll to the bottom, and then select Advanced Tools.

- Click MANAGE for the domain that you want to connect to Shopify.

Step 2: Update the A records
Note: An A record is required only when connecting the root domain (for example, shopify.com). If you're connecting a subdomain (for example, shop.shopify.com), then you only need to configure a CNAME record.
- Locate the A record, and then click the
 > Edit.
- Update the third field to
23.227.38.65. - Update the TTL to
1 hour.
- Click EDIT.
Step 3: Update the CNAME records
- Locate a record that has
WWW, and then click the > Delete. If you need this record, then ensure that you save a copy of it. - Click Add record.
- Update the Type to
CNAME. - Update Refers to to
WWW. - Update Alias to to
shops.myshopify.com. - Update TTL to
1 hour.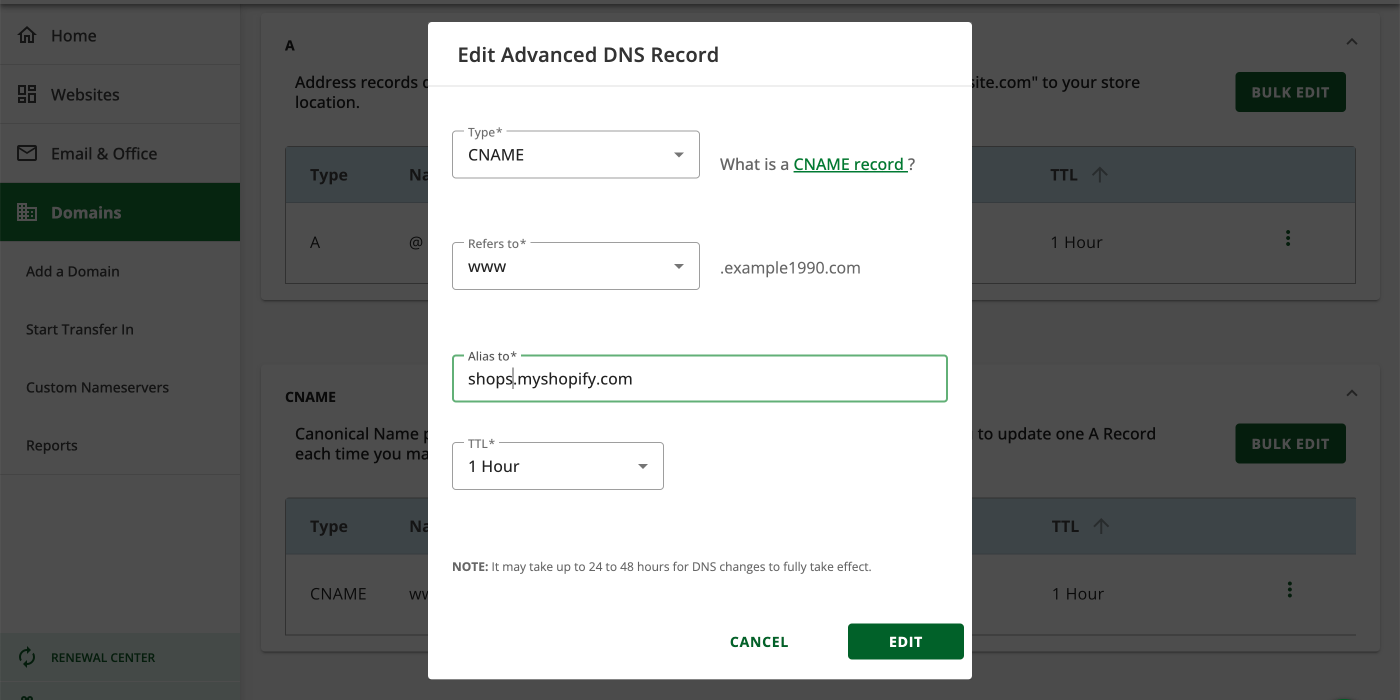
- Click EDIT.
Step 4: Connect your domain to Shopify
From your Shopify admin, go to Settings > Domains.
Click Connect existing.
Enter the domain name and click Next.
Step 5: Additional verification for your Shopify domain
- Go back to Network Solutions, and then click Domains > Advanced Tools > Manage > Add Record.
- Update Type to
TXT. - Update Refers to to
Other Host. - Update Host name to
shopify_verification. - In a new tab, go to your Shopify admin, click Settings > Domains, and then click the domain that you're verifying.
- Locate the New value, and then click the copy icon.
- Go back to your Network Solutions tab, and then paste the New value in TXT Value.
- Update TTL to
1 hour.
- Click EDIT.
- Go back to your Shopify admin tab, and then click I updated DNS records.